Thursday, May 1, 2014

Print a Pretty Ponti!

Whenever I travel back home to Melbourne there are a few places I will always visit. My Dads restaurant: Brooks Bar, the Camberwell Markets, the fantastic asian grocery near mums (to make something nice for the family), and lastly and definitely not least: Tessuti Fabrics. I know that a lot of their stuff is available online, but nothing compares to being able to walk around that place, and most importantly,  feel some of the beautiful material available.

This project marked the beginning of one of the most rewarding resoultions I had ever made: that 2013 would be my year of only sewn clothing. I didn't buy a single piece...I made everything. I'll expand on that experience at another time, but its kinda central to this dress, because it really convinved me that it was possible!

As soon as I saw this crazy fabric, I thought of some of the amazing pieces I had seen from Mary Katrantzou around that time (from her 2012/13 collection):


The prints alone, are fabulous, but they way it all works in a garment is pretty jaw dropping. And I knew I wanted to try some sort of...'homage' to this amazing collection.

I had received a last minute invitation to a wedding, while I was on holiday in Melbourne and didn't bring anything super appropriate with me, so with only four days to complete something, I decided to modify a pattern I had just finished: I was happy with the fit, and could easily download it and print it out away from home.

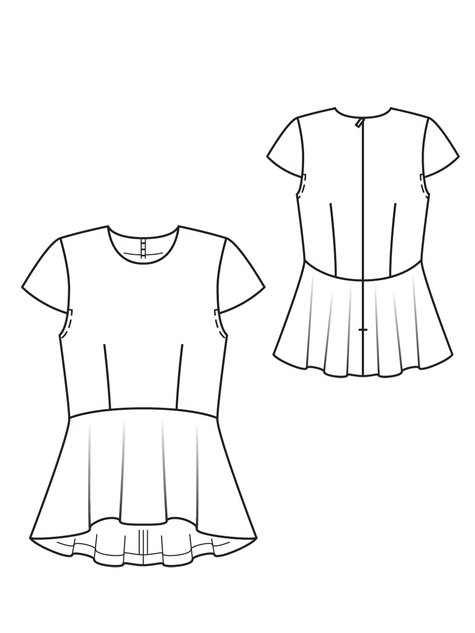
The bodice was the only part I was interested in, but I heavily modified that by removing darts and inserting a single wrap-around panel from the front and back (I knew I wanted to include a darker section of the print there to make my waist look slimmer). I created a longer sleeve and shortened the back slightly. I did try inserting a zip, but it really wasn't necessary with the ponti and I was missing the reinforcement (and more knowledge about sewing knits) that I needed to stop it from rippling.
I just drafted the skirt from scratch and moved the gathers around to compliment the print and maintain the symmetry in the front and back bodice.


Super proud of this one, and definitely a defining moment in my short sewing career!


Monday, April 28, 2014

Butterick B5884 and my dress for Becci's Wedding

As soon as I received an invitation to Becci's wedding, I started planning my dress. I was in the middle of my year of not buying and only sewing clothes and I had worn my only new pretty dress to two weddings already so I wanted something new.
First stop was Potter Textiles, where I found an amazing cotton silk, with a large scale pattern of crystals. I LOVED the print, but wanted to find something relatively gathered to minimise it a little.
I went madly searching for some ideas on pinterest, but apparently when you search "dress to wear to a wedding" all the words in-between get lost and you end up with a lot of white! Finally found this:

Then came trying to recreate it. I had a little go at drafting it myself, but without a proper sloper and a very rickety dress form, I struggled. I finally cut my losses and went for a pattern: Butterick B5884, version A.


There were definitely problems, I took in the back, re adjusted the gathers of the bodice and took about 5cm out of the back of the skirt as it was really bulky (There wasn't much drape to the fabric, so I'm not sure if the bulk was just due to that)! But here is the finished product and I'm super happy with it!


Monday, March 31, 2014

Sheer silk Grainline Scout t-shirt

This is probably my favorite sewing pattern to date. I have about 7 so far (which I'll be in process of uploading soon!) and I can churn one out in about 2 hours from start to finish. Its the scout woven tee from Grainline Studio who make the basic patterns that I could never seem to find with the commerical patterns, but were really all I ever wanted to make with some of the more interesting prints that needed something simple to really shine. 

I've made a few modification to the pattern so far. This one was one of the first that I had taken in a little on the sides. Also due to the super delicate nature of the fabric I did away with the bias binding on the neck, and instead hand basted then machine stitched a rolled hem.

I bought the fabric from Tessuti fabrics in Melbourne, maybe 3 years ago, and I believe I got the end of the roll. It had a lovely white break (perpendicular to the grain) in the print with a little collection of japanese (?) characters on the end and an overlocked selvedge that I really liked, and decided to keep. So I also extended the length, just to be safe, incase I wasn't happy with it and could hem it back to the original and pretend it never happened! Oddly enough it wasn't straight with the grain

I don't wear it as often as I like to (I'm terrible when it come to laundering silk) but it is a beautiful piece I'm very proud of.


Wednesday, September 25, 2013

Oh the Irony!! The Ironman Ironing Board Cover.

My boyfriend is a big fan of Iron Man and I love wordplay, so I guess this was inevitable. We called the Iron 'Tony', but of course I knew I could take it further...

With an Ironman ironing board cover!!!


My Mum is a very good seamstress, and I've watched her make several different ironing board covers over the years, so the how to wasn't a challenge. I sourced the material from Ebay. There aren't many sources for the licensed fabric in Australia, and trying to find something with just Ironman and not any of his fellow avengers was actually quiet difficult. There were several flannelette options, but its flammable and therefore not a fantastic choice. So finally settled on this, and some specific heat resistant wadding from Spotlight (the kind for oven gloves). I'm really happy with the result! Anything that can bring a smile to my face when I'm doing any kind of household chore is always good!


How I did it: 
1. Just turn the ironing board upside down on the fabric, and trace around it. Thats line 1
2. Add a seam allowance of 10cm all round the first line. Line 2.
3. Roll the edges over twice, to create a tube (make sure its wide enough to fit your elastic)
4. Sew it down, leaving a 2cm gap
5. Thread the elastic through, sew the ends of the elastic together and close up the whole 
6. Cut out some heat proof wadding, using the ironing board as a template again.
7. Place the wadding, then pop on the cover!!


Saturday, March 16, 2013

My DIY Kindle Paperwhite Cover

So, I splurged a little and bought myself a kindle paperwhite.
With all the traveling between Melbourne and Perth, I thought being able to take my library with me would be a huge advantage. I'm saving heaps on english texts and its really helped to get me back into reading again. I think its money well spent!
Now that I have it in my hot little hands, I need to think about a case - the screen is apparently even more fragile then an Iphone/ipad! I didn't want to spend too much before i knew exaclty what I wanted from it. So i thought I'd make my own:


It's really simple. Just some cotton calico on the inside layer and then some of the leftover fabric from Jess' Christmas present on the outside, reinforced with interfacing. Super easy!

Also my first go playing with my new camera and lightroom. Excitement all around. Now all I need is the time to learn how to use everything!